

How To Make Vinyl Signs With Cricut
Spring to How-To
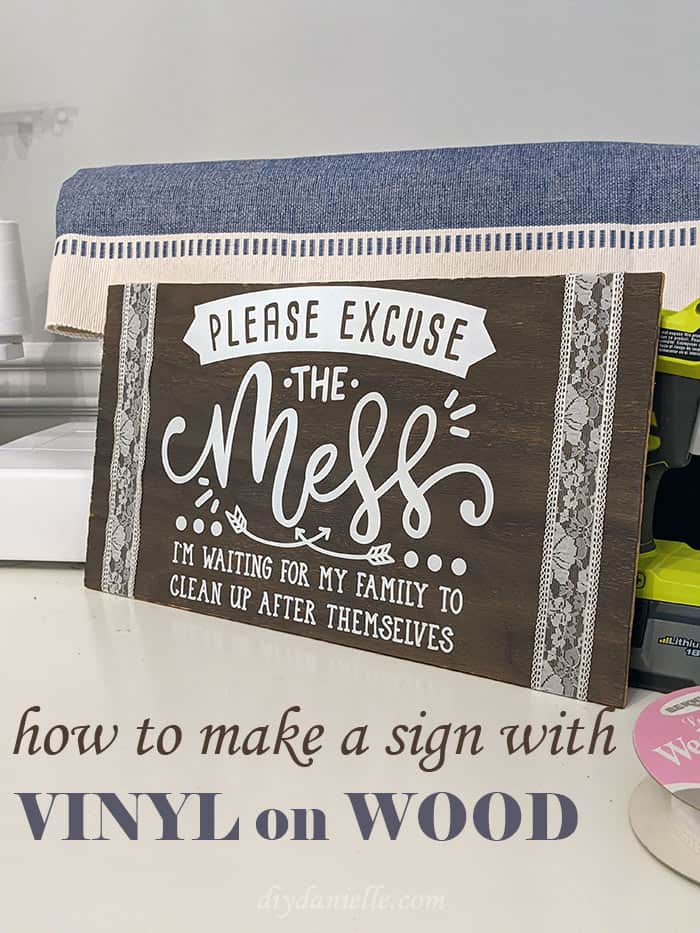
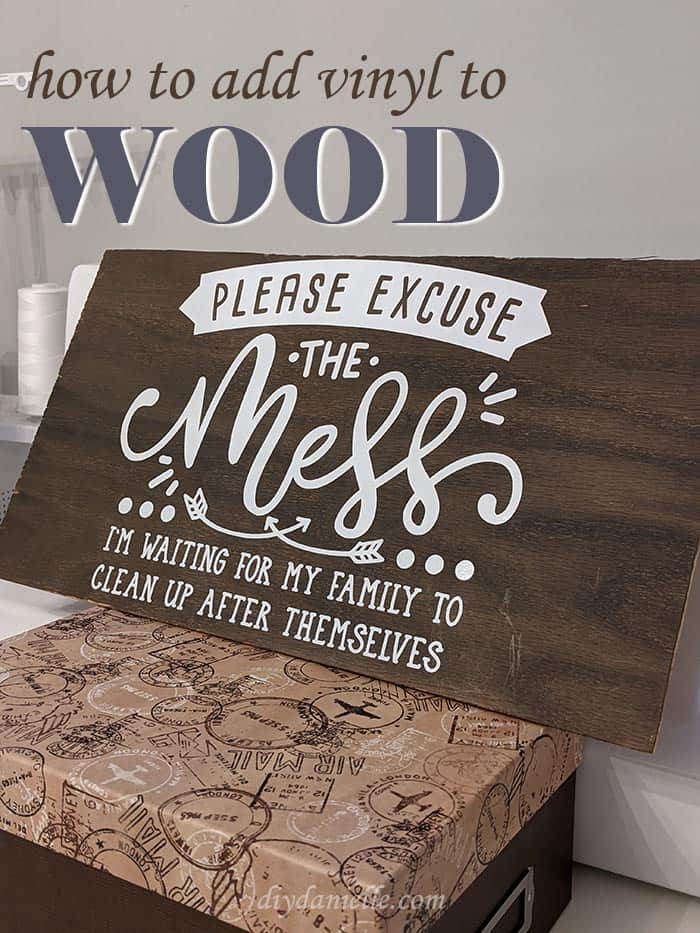
Larn how to make vinyl signs with a Cricut machine. This quick sarcastic "Delight alibi the mess" wood sign is perfect for snarky moms who believe anybody should make clean up after themselves.
I am super sarcastic and appreciate all things snark. When I originally saw the "Delight excuse the mess, my children are making memories" signs, I nearly savage out of my chair. It's cute, just honestly I'm months into a pandemic now and and then exhausted. My kids are home 24/vii and they're hella messy. I LOVE their creativity, only I swear it will break me i of these days.
Here's an example… the night earlier my birthday I cleaned upwards the business firm a chip, knowing I didn't want to accept to clean up on the actual mean solar day. I come downstairs that morning and my sons are "making me a birthday nowadays" in the clean office, pulling down all of the craft supplies that I'd Just put away, and telling me I can't come into the office because there is a summit secret operation underway. Spoilers- I had more cleaning up to do.
Needless to say- My sarcasm meter has hit a 10 and it volition probably stay in that location until I have far less stress in my life. I'm sure some of y'all can appreciate this. Hither'southward the sign for those of yous who are tired of 'making memories' and just trying to survive. The exhausted mom in me sees the exhausted mom in you. Namaste.
Go the SVG here —> https://diydanielle.com/product/excuse-mess-svg/
Here's how to actually brand the sign though, in case you've never worked with vinyl on woods before.
This post contains chapter links which may earn me commissions should yous click through them and take sure deportment. As an affiliate for Cricut, Amazon and other sites, I earn from qualifying purchases. Please DIY carefully. View my full legal disclosures here.
Please read the whole mail service then you don't miss any of import data!
Tips for Applying Vinyl to Woods
- Use PERMANENT VINYL only. 631 or "regular" vinyl is more prone to peeling off…. signs are permanent and so you should use permanent vinyl. If yous're applying to wood exterior, at that place's Oracel 751 which is rated for long term outdoor use. I used the 751 on our Goat House and Kids Garage.
- If painting your wood, make sure to let the paint cure for 24-48 hours earlier applying vinyl.
- Vinyl sticks improve to untreated woods, but I don't generally use untreated woods for my projects. Sanding your wood and applying a articulate coat earlier applying the vinyl may aid. My forest for this project is treated with a natural stain.
- Do non apply a sealer over the vinyl. If you insist on doing this, wait 48 hours earlier attempting information technology so the vinyl adheres properly. I've used mod podge over vinyl before with decent results.
- If y'all're having trouble with the vinyl sticking, you tin try to use heat using a hair dryer and pressing the vinyl into the wood. This can help it sort of melt into the crevices of the wood a bit.
- Alternatively, you tin learn how to apply atomic number 26 on vinyl to wood or utilise the vinyl equally a stencil and use paint to stencil the design; if you lot cull to stencil, you want to reverse weed the pattern.
How to Make a Sign with Vinyl
Supplies:
- Blank Wood Board, Stained ix×17″
- Sarcastic Please Excuse The Mess SVG
- Permanent Cricut Vinyl
- Cricut Transfer Tape
- Lace Or Other Decorations
- Glue gun
- Command Strips
Delight Excuse the Mess Vinyl Sign Tutorial
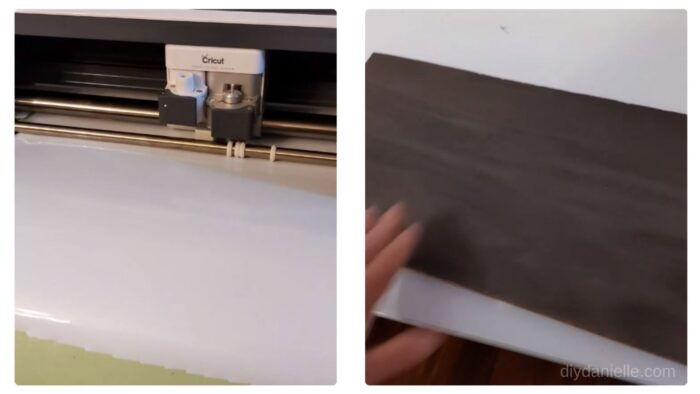
Step 1: Cut your SVG on your Cricut Maker
Step 2: Cutting and prepare a piece of woods.
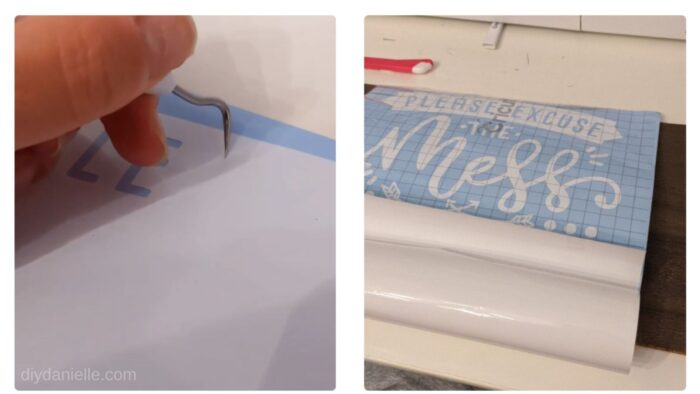
Step 3: Weed your design.
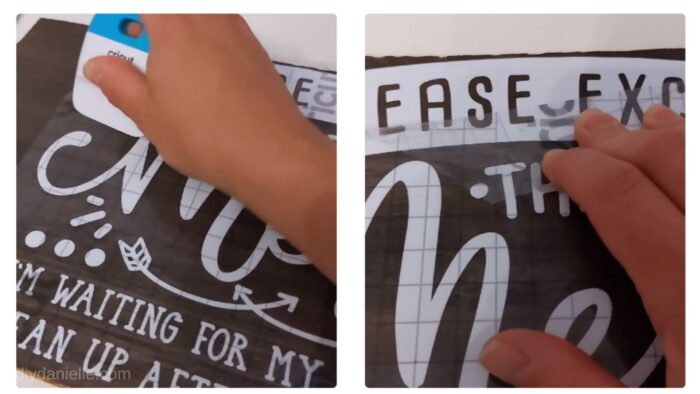
Step 4: Utilize transfer paper to your design.
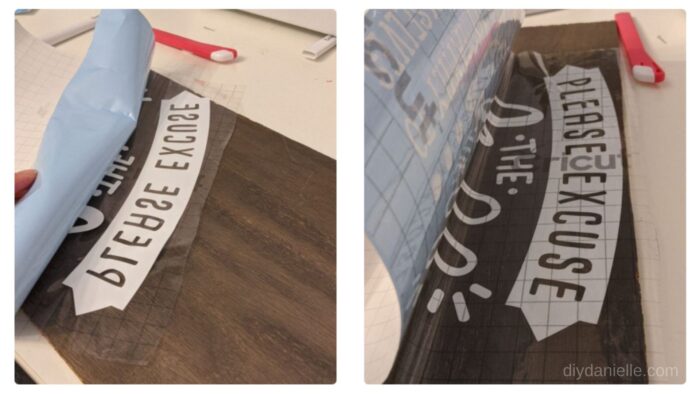
Footstep five: Remove the backing on the vinyl.
Step vii: Press advisedly to ensure the vinyl adheres to the woods. I use a scraper to actually make sure information technology adheres.
Footstep eight: Remove the transfer newspaper. Occasionally, if something isn't sticking well, I hit the vinyl with a hair dryer on hot to soften the vinyl and finger press the vinyl into the wood grain. Don't fire or melt your vinyl though!
Tip: I often reuse my transfer paper 2-3 times.
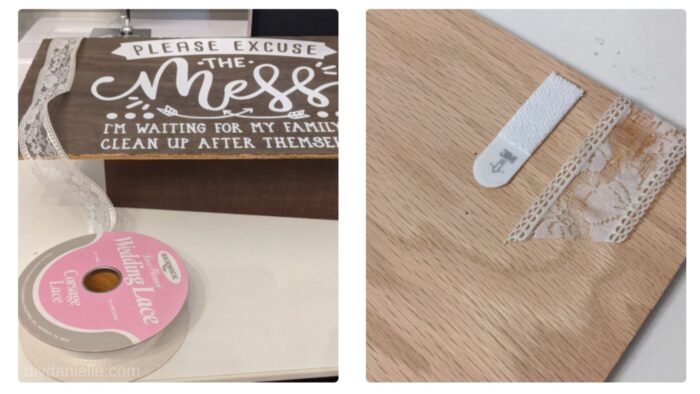
Footstep ix: Add together lace or other decorations to either side.
Make sure you utilise a permanent vinyl for wood or y'all can endeavor using HTV on wood too. That actually works pretty well. This slice of woods was finished with a natural stain and the vinyl seemed to stick fairly
I also layered vinyl on forest for our board game cabinet.
Here's the SVG file in my store…
Please share and pin this post! If y'all make this projection, share it in our Stuff Mama Makes Facebook Group. Nosotros accept regular giveaways for gift cards to craft stores. You can also tag me on Instagram @doityourselfdanielle; I honey seeing everything you brand!
Learn how to brand a cute sign using vinyl and your Cricut machine. This is a super piece of cake projection and a great use for scrap wood.
Materials
- Blank Wood Lath, Stained 9×17"
- Sarcastic Please Alibi The Mess SVG
- Permanent Cricut Vinyl
- Cricut Transfer Tape
- Lace Or Other Decorations
- Mucilage gun
- Control Strips
Instructions
Step 1: Cut your SVG on your Cricut Maker
Stride 2: Cut and prepare a piece of wood.
Step 3: Weed your design.
Step 4: Apply transfer paper to your design.
Stride v: Remove the backing on the vinyl.
Footstep 6: Using the transfer paper to place your vinyl on your wood. Make sure to get information technology exactly where y'all desire before letting the vinyl attach to the surface.
Pace 7: Press carefully to ensure the vinyl adheres to the woods.
Pace 8: Remove the transfer paper.
Footstep 9: Add lace or other decorations to either side.
Step 10: Add Control Strips to the back.
Click hither for the DIY Vinyl Signs Google Spider web Story!

Source: https://diydanielle.com/vinyl-signs-cricut-machine/
Posted by: crutcherthowenty.blogspot.com
0 Response to "How To Make Vinyl Signs With Cricut"
Post a Comment